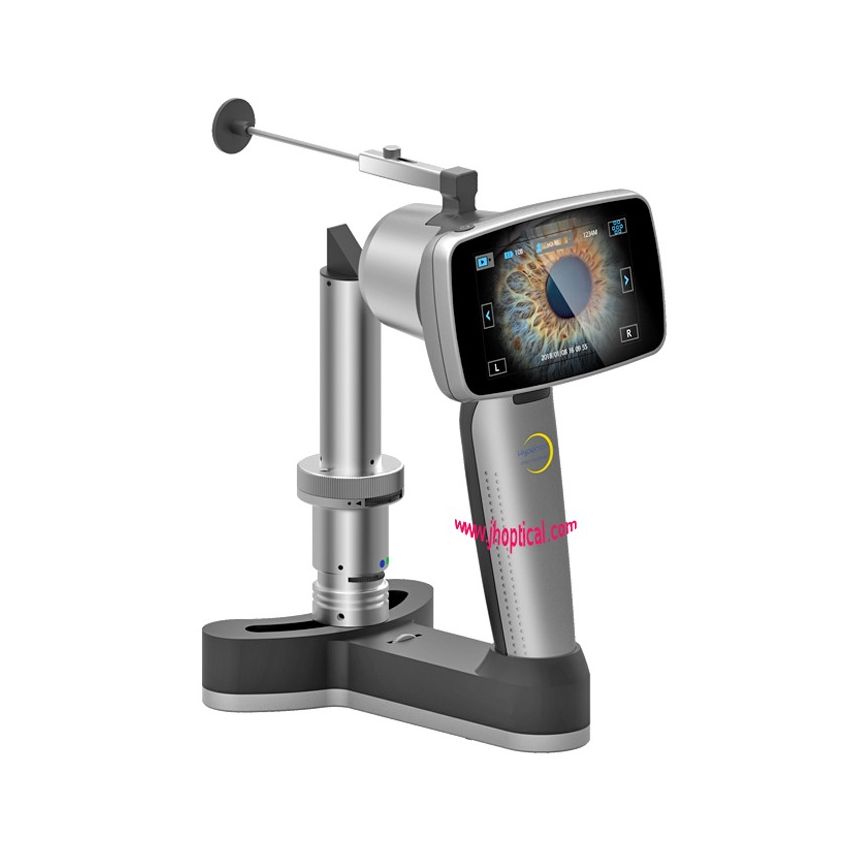
How to Choose a Slit Lamp: Specifications, Operation, and Desktop handhold Comparison
Desktop Slit Lamp vs Handheld Slit Lamp
How to Choose a Slit Lamp: A Practical Buying and Operation Guide
A slit lamp is one of the most essential diagnostic instruments in eye care. It allows clinicians to examine the eyelids, conjunctiva, cornea, anterior chamber, iris, lens, and anterior vitreous with high magnification and stereoscopic vision.
For clinics, hospitals, optical chains, mobile eye care providers, and Ophthalmic equipment distributors, choosing the right slit lamp involves more than comparing price. You should evaluate optical performance, illumination quality, ergonomics, workflow efficiency, maintenance cost, installation requirements, and after-sales support.
This guide covers how to select a slit lamp, how to operate it correctly, which specifications matter most, and how major brands differ.
desktop slit lamp vs Handheld Slit Lamp
desktop slit lamps are the standard choice for comprehensive anterior segment examination. Handheld slit lamps are useful for mobile practice, pediatric patients, nursing homes, and field screening.
Key Specifications to Check
1. Microscope Type and Magnification
Most desktop slit lamps use either converging stereoscopic optics or Galilean parallel optics. Converging systems often provide 10x and 16x magnification, while Galilean systems may offer 3 to 5 magnification steps such as 6x, 10x, 16x, 25x, and 40x.
Higher magnification helps detect fine corneal, lens, or endothelial changes. However, 10x and 16x remain the most frequently used settings in routine examinations.
2. Illumination System
- LED: longer service life, lower heat, lower energy consumption, and more stable brightness.
- Halogen: familiar color rendering and traditional appearance, but shorter lamp life and higher heat output.
For export markets, LED models are often preferred because they reduce replacement costs and improve patient comfort.
3. Slit Width, Length, and Angle
A good slit lamp should provide:
- Continuously adjustable slit width, typically 0–14 mm
- Adjustable slit length, typically 1–14 mm
- Rotatable illumination arm for oblique and retroillumination
- Optional slit decentration for advanced techniques
Wider slits are useful for general observation. Narrow slits help assess corneal depth, anterior chamber depth, and lens layers.
4. Filters
Common filters include:
- Cobalt blue filter: used with fluorescein for corneal staining and contact lens fitting
- Red-free/green filter: improves vascular contrast
- Heat-absorbing filter: reduces infrared heat
- Neutral density filter: reduces brightness for sensitive patients
- Yellow filter: enhances fluorescein contrast in some models
5. Working Distance and Diopter Adjustment
Typical working distance is around 80–100 mm, depending on magnification. Diopter adjustment should cover at least -8D to +5D so examiners with different refractive errors can use the instrument comfortably.
6. Imaging and Digital Options
Many clinics now prefer slit lamps with:
- CCD or CMOS camera
- USB/HDMI output
- Image capture software
- EMR integration
- Teaching tube for training
Digital imaging improves patient education, record keeping, and remote consultation.
How to Operate a Desktop Slit Lamp
Step 1: Prepare the Instrument
- Check that the slit lamp is connected to a stable power supply.
- Clean the chin rest, forehead band, and handles.
- Unlock the carriage so the joystick can move freely.
Step 2: Adjust the Examiner’s Position
- Set the examiner’s chair height.
- Adjust the eyepieces to your interpupillary distance.
- Set diopter rings to zero if you do not need correction, or adjust them to your prescription.
Step 3: Position the Patient
- Ask the patient to sit comfortably.
- Adjust the chin rest so the lateral canthus aligns with the black reference mark.
- Ask the patient to hold the handlebars and keep the forehead against the headband.
Step 4: Set the Light Beam
- Start with low illumination intensity.
- Adjust slit width and height.
- Choose the appropriate filter.
- For coarse focusing, aim the beam at the cheek or nose first to avoid shining directly into the pupil.
Step 5: Examine the Anterior Segment
Use a systematic sequence:
- Eyelids and lashes
- Conjunctiva and sclera
- Cornea
- Anterior chamber
- Iris and pupil
- Lens
- Anterior vitreous
For fluorescein examination, switch to cobalt blue light after completing the white-light corneal inspection.
Step 6: End the Examination
- Turn off the illumination.
- Lock the carriage if the instrument will be moved.
- Clean contact surfaces again.
Handheld Slit Lamp Operation Tips
Handheld slit lamps are useful when patients cannot sit at a desktop unit, such as bedridden patients, young children, or field screening cases.
Key tips:
- Check battery level before use.
- Use lower brightness for sensitive patients.
- Maintain a stable working distance of about 60–100 mm, depending on the model.
- Use cobalt blue filter for fluorescein assessment.
- Store the device in a protective case to avoid optical damage.
Maintenance and Hygiene
Daily maintenance should include:
- Wiping chin rests, forehead supports, and handles with approved disinfectant
- Checking joystick movement and carriage locks
- Inspecting filters and illumination brightness
- Keeping the optical surface clean with lens tissue
- Avoiding excessive dust cover use while the lamp is hot
For desktop models, also check:
- Power cable and plug condition
- Base stability
- Camera and software connections
- Spare bulb or LED module availability
For handheld models, battery management is critical. Confirm charging time, operating duration, battery replacement cost, and whether spare batteries are available.
Installation and Space Requirements
Desktop slit lamps need:
- A stable table or ophthalmic unit
- Adequate electrical supply, usually 100–240V depending on model
- Enough space for examiner movement
- Cable management for cameras and computers
- A dimmable examination room for better contrast
Handheld slit lamps require minimal installation but benefit from:
- A charging stand
- A protective carrying case
- Optional smartphone or camera adapters
- A headrest accessory for more stable examination
Cost Considerations
Desktop slit lamps generally cost more than handheld models. Price depends on:
- Optical system quality
- Number of magnification steps
- LED or halogen illumination
- Imaging capability
- Brand positioning
- Warranty and service network
Handheld slit lamps are more affordable and suitable for mobile clinics, primary care, school screening, and remote areas. Desktop slit lamps are better for high-volume clinics that need detailed stereoscopic examination and digital documentation.
How to Choose the Right Slit Lamp
Choose a desktop slit lamp if you need:
- Routine comprehensive eye examinations
- High stereoscopic clarity
- Multiple magnification levels
- Camera or EMR integration
- Long-term clinic use
Choose a handheld slit lamp if you need:
- Portable anterior segment examination
- Pediatric or bedridden patient assessment
- School, community, or rural screening
- Lower installation and space requirements
For distributors, also confirm:
- Target market voltage requirements
- Local medical device registration rules
- Availability of spare parts
- Warranty terms
- Training and technical support
- Compatibility with cameras, tonometers, and ophthalmic units
Final Note
The best slit lamp depends on clinical workflow, patient volume, budget, and whether digital imaging is required. Premium brands offer superior optics and long-term reliability, while value-oriented brands can meet routine diagnostic needs at a lower cost. For most growing practices, a desktop LED slit lamp with at least 10x and 16x magnification, cobalt blue filter, and optional imaging provides a balanced starting point.
Related News